Rosemary LoganCheckout the Spring 2020 section of NAU's two-semester Permaculture Design Course Blog! Archives
December 2023
Categories |
Back to Blog
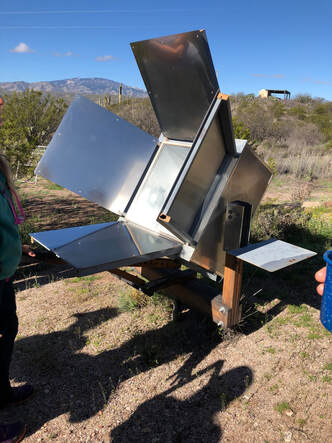
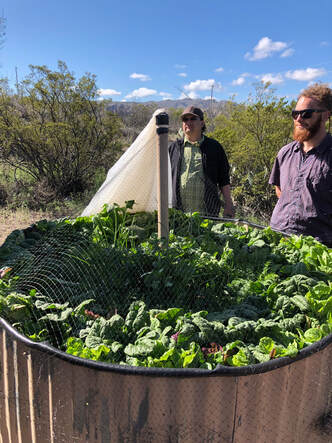
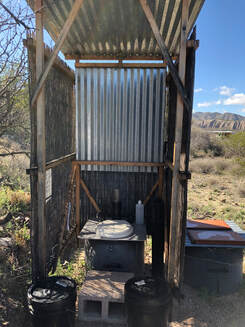
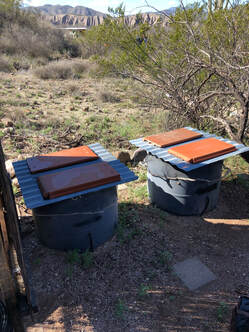
Simple Living in Cascabel3/9/2020 By Sierra Riker 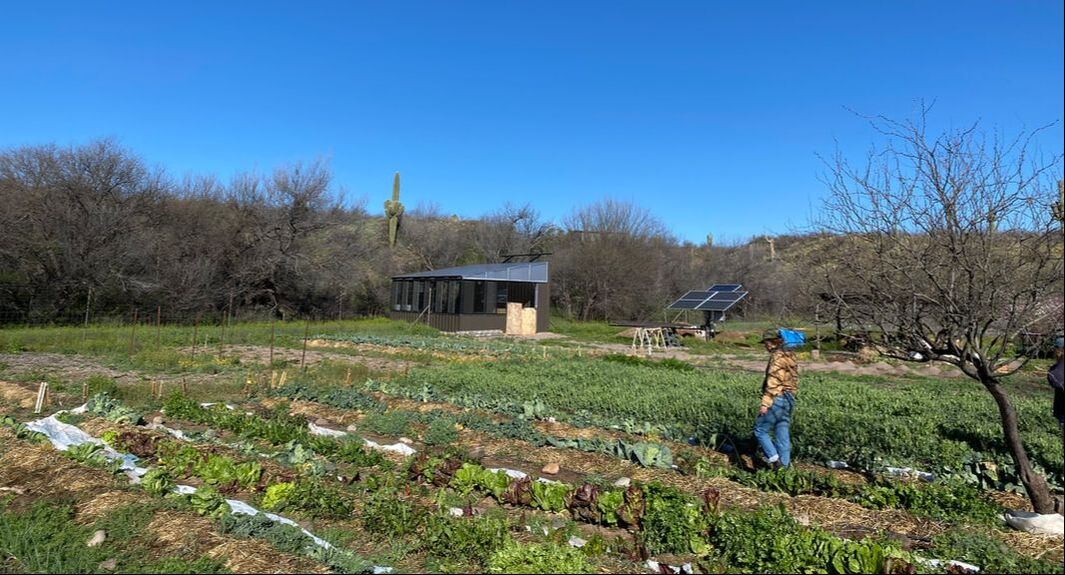 Cascabel is a small settlement just northeast of Tucson, Arizona. Many of the residents had built their homes and live sustainably on the land. Despite the neighbors being so far apart, they share a tight-knit community through community dinners, common areas, and a community garden. David Omick and Pearl Mast in particular have an abundance of knowledge in living off of the land. They hand pump their water from the water table, use a solar heater for showering, and store their food in barrels outside and refrigerated goods in an ice chest that they leave open overnight and close during the day. David and Pearl also have a garden with a net over it to keep wildlife away, a solar oven for baking, and a solar array. They use the compost from their composting toilet to supply the garden. David and Pearl play a large role in helping the community with the community garden, building solar arrays for their neighbors, and other projects like building cairns for the local trail system. See omick.net for more information and guides. Above: Cascabel community garden Below left: David and Pearl's solar oven Below right: David and Pearl's personal garden
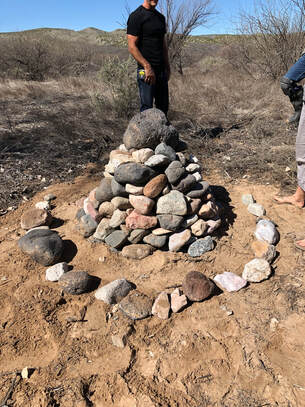 How to Build a Cairn: 1) Find an optimal location- Cairns are generally used to mark trails when they are not visible over a distance, so building one next to the trail and on a higher part of the landscape is recommended. 2) Gather stones appropriate for the size of the cairn- Depending on the height, larger rocks are needed for taller cairns and smaller rocks are needed for shorter cairns. It is important to find an assemblage of shapes. Flat rocks work well for the edges while round ones fit in the center. 3) Lay a base ring of rocks- Make it wide enough to support the height of the cone. Many rocks have a slant to them, so make sure the slant is facing the center of the cairn to improve stability. 4) Stack the rocks- Continue to stack the outer edge in rings while keeping the center and edge level. Make sure the rocks are stable and the walls slope gently inward. 5) Put a centerpiece on top- If you find a unique rock, place it on the top! It helps to make the cairn more eye-catching and adds a bit more fun into building it. Congratulations! You have built a cairn. It should be stable enough to remain standing, requires little up-keep and will be beneficial to all hikers using the trail. Above: One of the completed cairns in Cascabel.
0 Comments
Leave a Reply. |
 RSS Feed